On this page
- Why Discord's built-in welcome isn't enough
- Step 1. Add the bot and open the Welcome module
- Step 2. Pick a channel and write the welcome message
- Step 3. Add a welcome image with the member's avatar
- Step 4. Send a welcome DM
- Step 5. Give new members a role automatically (auto role)
- Goodbye messages
- Welcome messages not working? Check these 4 things
- FAQ
The first minute on a server decides whether someone stays. If a new member only sees a list of channels and silence, they usually leave. A good welcome message tells them three things: someone noticed them, where to start, and what to do next.
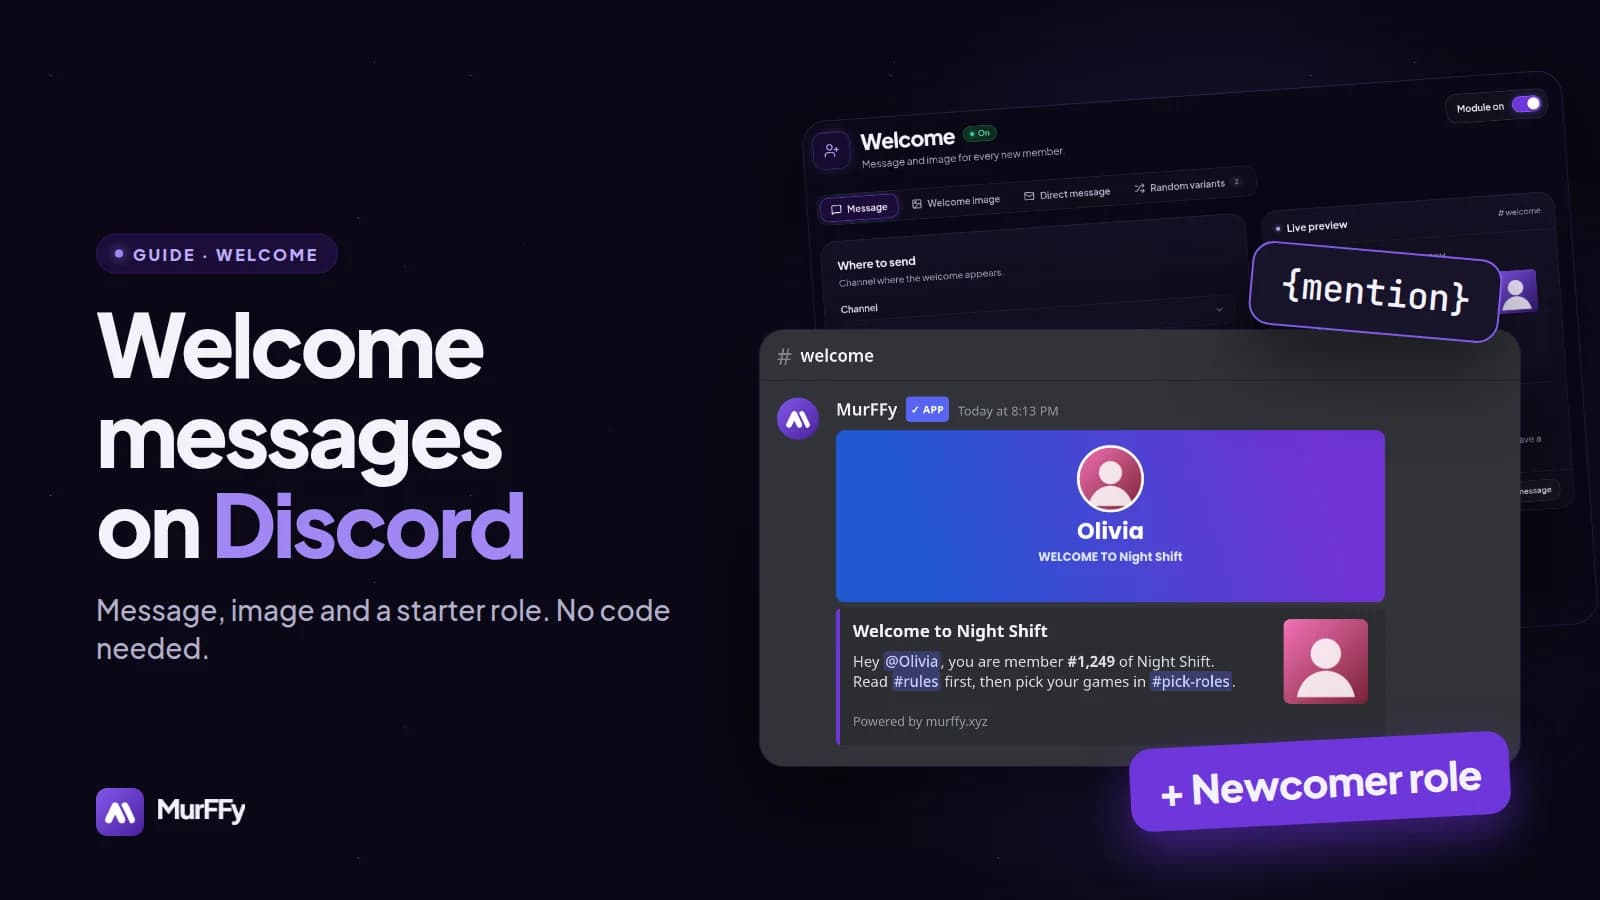
In this guide you will set up a complete Discord welcome with MurFFy: a message in your welcome channel, a welcome image with the member's avatar, a direct message and an automatic starter role. Everything happens in a web dashboard. No code, no commands.
Quick answer: how to make a welcome message on Discord
- Add MurFFy to your server and open the dashboard.
- Go to Welcome, pick a channel and write your message with variables such as
{mention}. - Optionally turn on the welcome image and a direct message.
- In Join Role, choose the role the bot gives every new member.
- Click Send a test message and check the result in Discord.
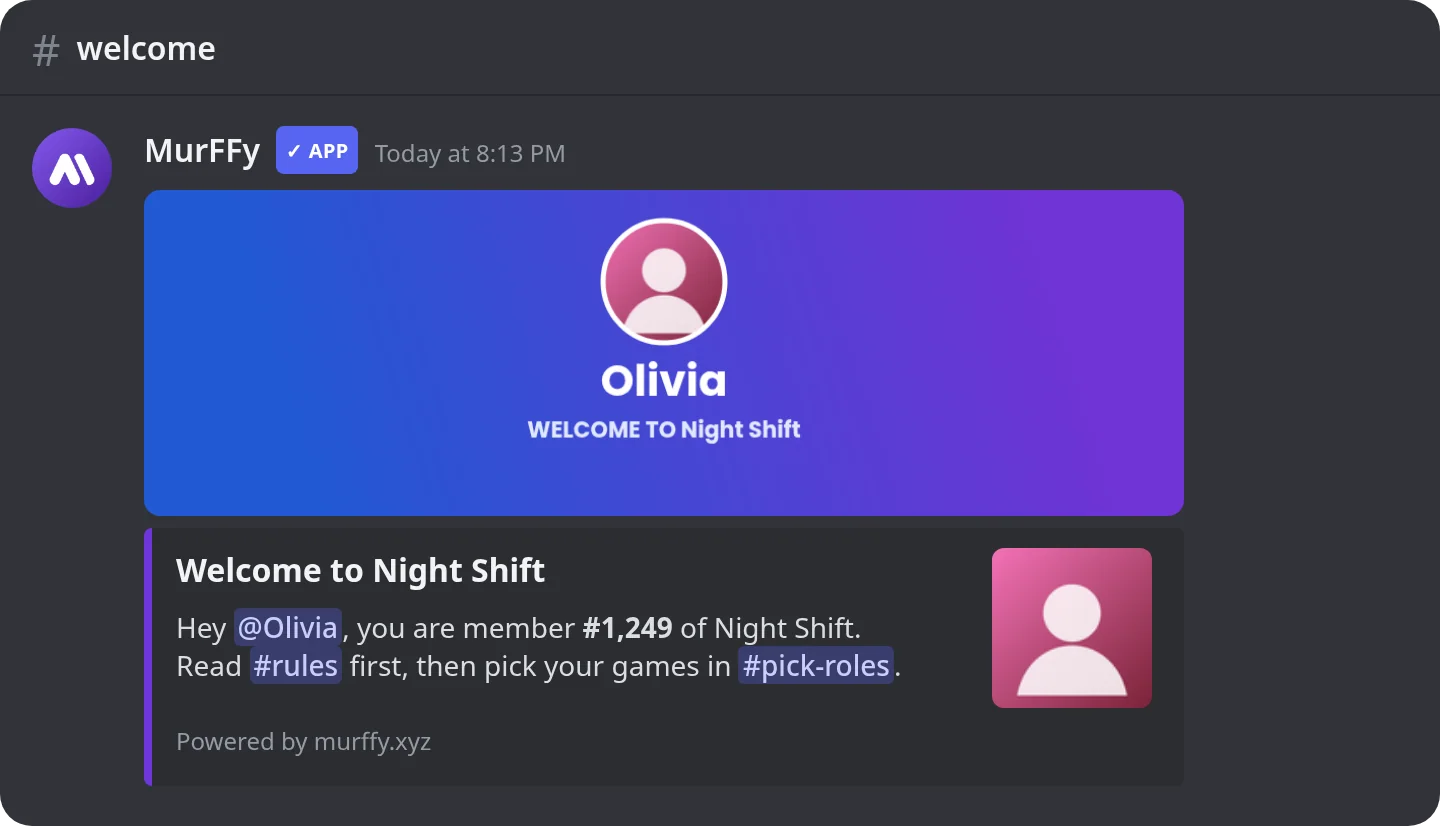
Why Discord's built-in welcome isn't enough
Discord has its own join messages, but they are random and you cannot edit them. You can't link your rules, point people to your roles channel, or give anyone a role. A welcome bot fixes all three:
- You write the text. The bot fills in the member's name, your server name and their member number.
- An image sets the mood. A card with the new member's avatar gets far more attention (and reactions) than plain text.
- Order from the first second. A starter role can unlock channels, mark newcomers or prepare them for verification.
Step 1. Add the bot and open the Welcome module
Log in at murffy.xyz with Discord. Next to your server, click Add bot and approve the permissions. You need the Manage Server permission to add a bot.
Back in the dashboard, pick your server and open Members & channels → Welcome in the sidebar. The Module on switch in the top right turns the whole module on.
Step 2. Pick a channel and write the welcome message
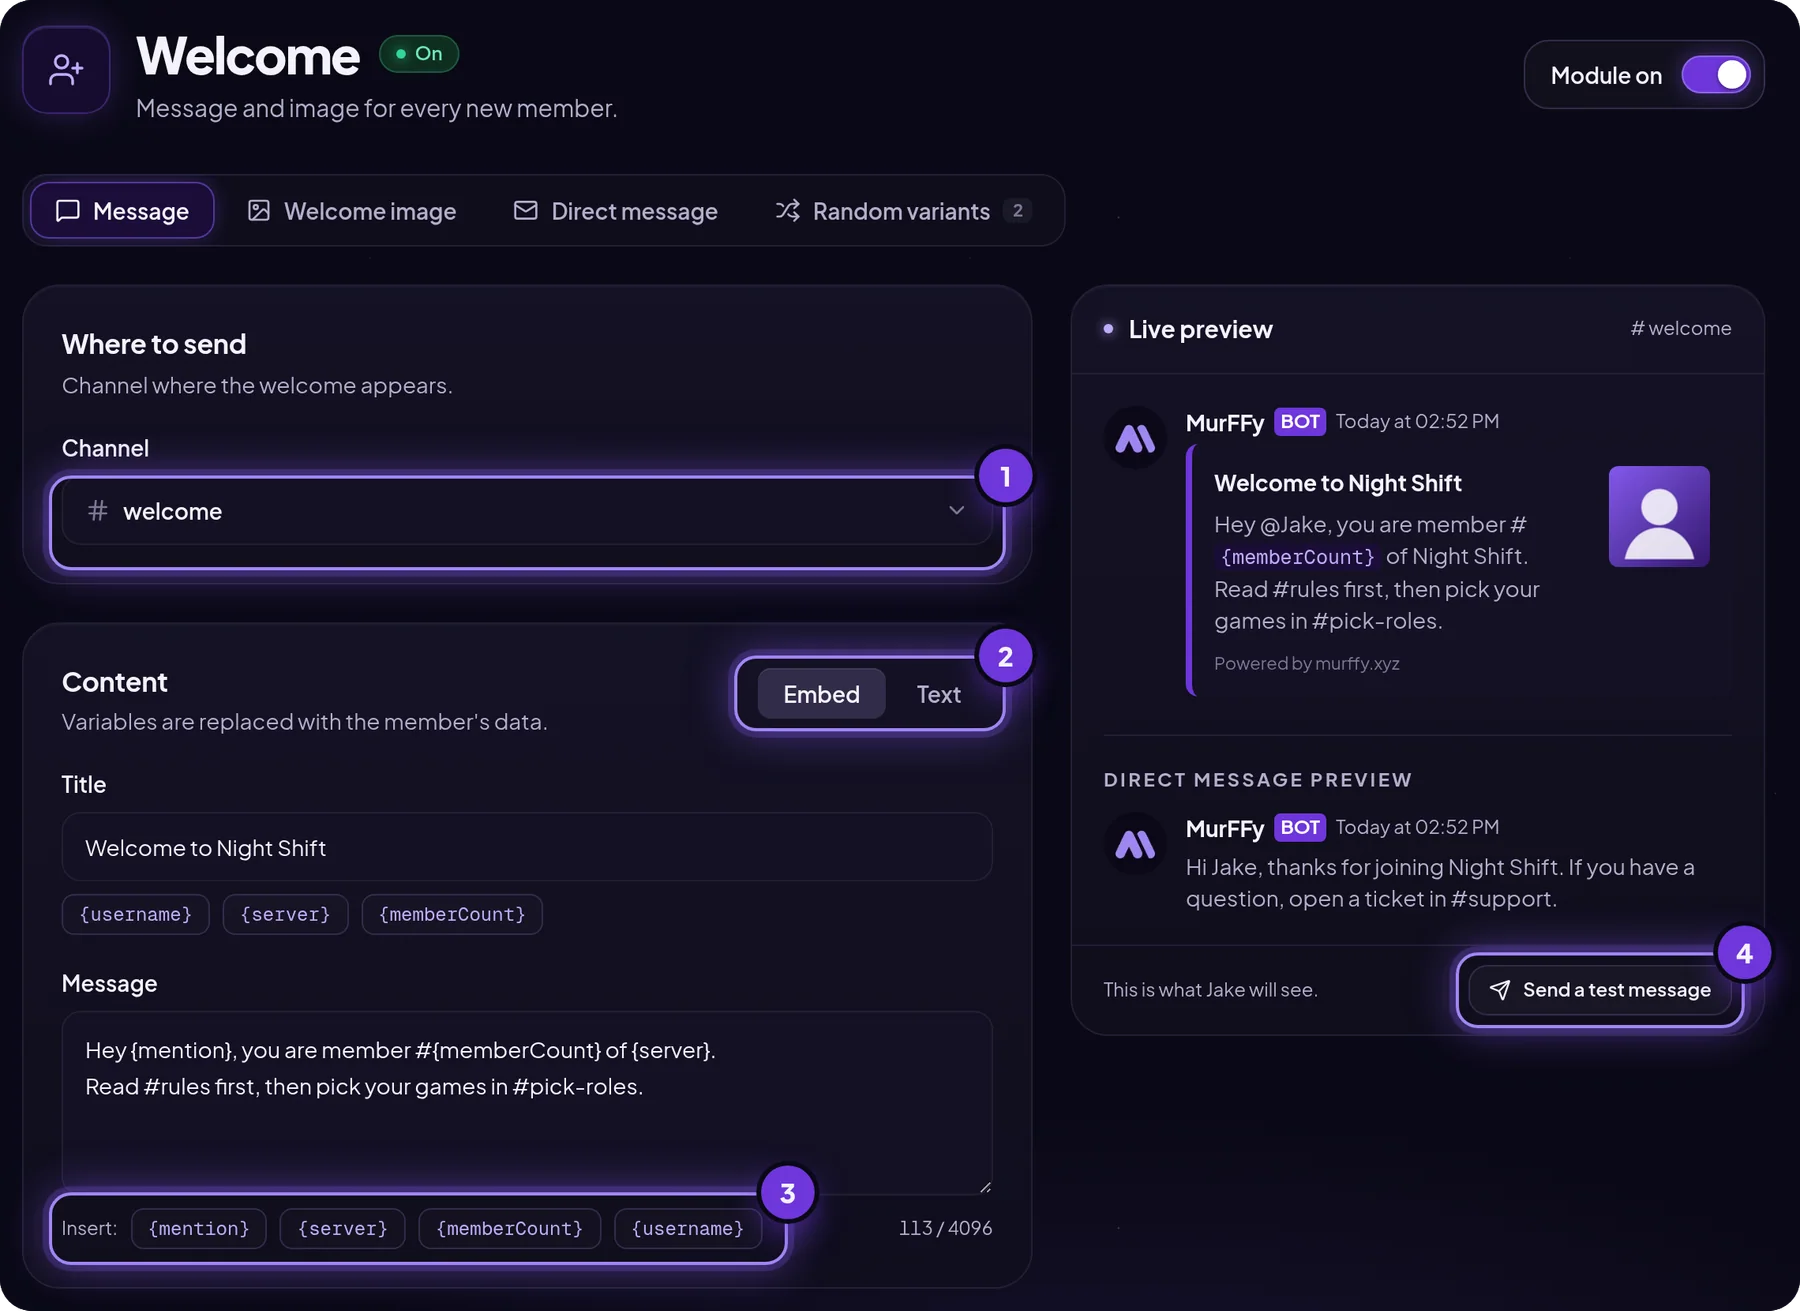
- Channel. Where the welcome appears, usually
#welcomeor#general. The bot needs permission to send messages there. - Embed or text. An embed is a card with a colored bar, a title and a thumbnail. It looks polished and holds up to 4,096 characters. Plain text holds 2,000 characters and fits small, casual servers.
- Variables. Click a variable under the text box to insert it at the cursor. The bot replaces it when the message is sent.
- Test. Send a test message posts the welcome to your channel as if you had just joined.
Variables you can use
| Variable | Replaced with | Example |
|---|---|---|
{mention} | A mention of the new member | @Olivia |
{username} | Their username, no ping | Olivia |
{server} | Your server name | Night Shift |
{memberCount} | Current member count | 1249 |
%userAvatar% | Avatar URL, e.g. as the embed thumbnail | image |
%serverIcon% | Server icon URL | image |
Tip:
{mention}pings the new member, so they see the welcome right away even in a busy channel.
Welcome message examples you can copy
A good welcome is short and ends with one clear next step:
Hey {mention}, you are member #{memberCount} of {server}. Start with #rules, then grab your roles in #pick-roles.{mention} just joined the crew. Say hi in #general and tell us what you play.Welcome {username}. Got a question? Open a ticket in #support and we will get back to you fast.
Want welcomes that don't repeat? Add a few versions under Random variants. The bot picks one at random each time (up to 7 variants).
Step 3. Add a welcome image with the member's avatar
A welcome image is generated for each new member, with their avatar, name and the text you choose. It is the most visible part of a welcome and the part that stops people scrolling.
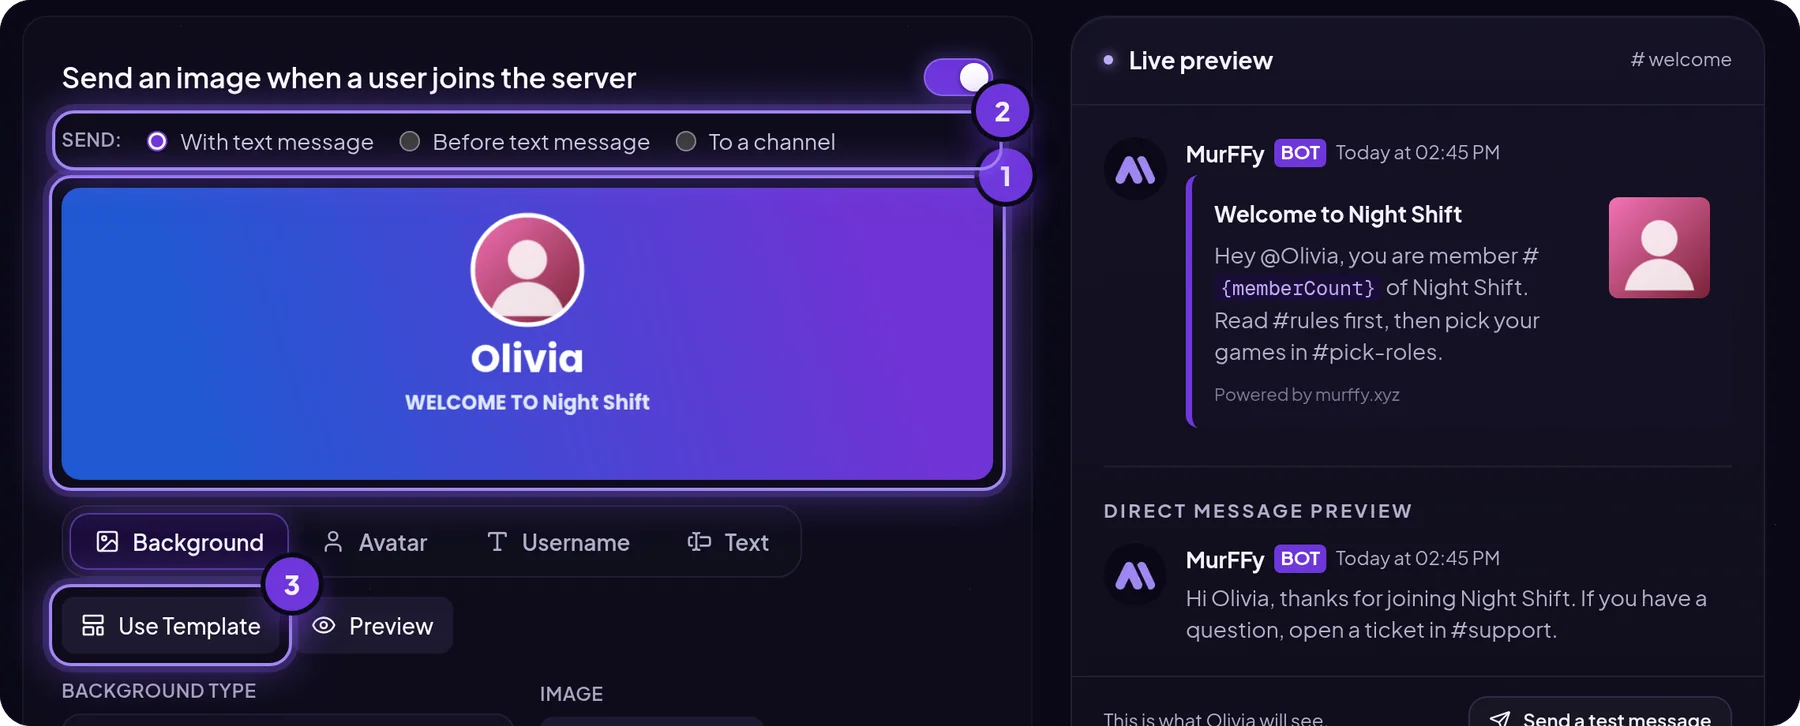
- Open the Welcome image tab and turn on Send an image when a user joins the server.
- Click Use Template and pick a layout. You can then drag any element on the preview.
- The Background, Avatar, Username and Text tabs change colors, gradients, the avatar border and the text. The background can also be your own image (JPG, PNG, WEBP or GIF).
- Choose how the image is sent: with the text message, before the text message or to a separate channel.
The same variables work in the image text, for example %username% and %server%.
Step 4. Send a welcome DM
Not everyone reads the welcome channel. A direct message lands straight in the member's inbox and is a good place for things that shouldn't get lost in chat: the rules link, verification steps, or how to contact staff.
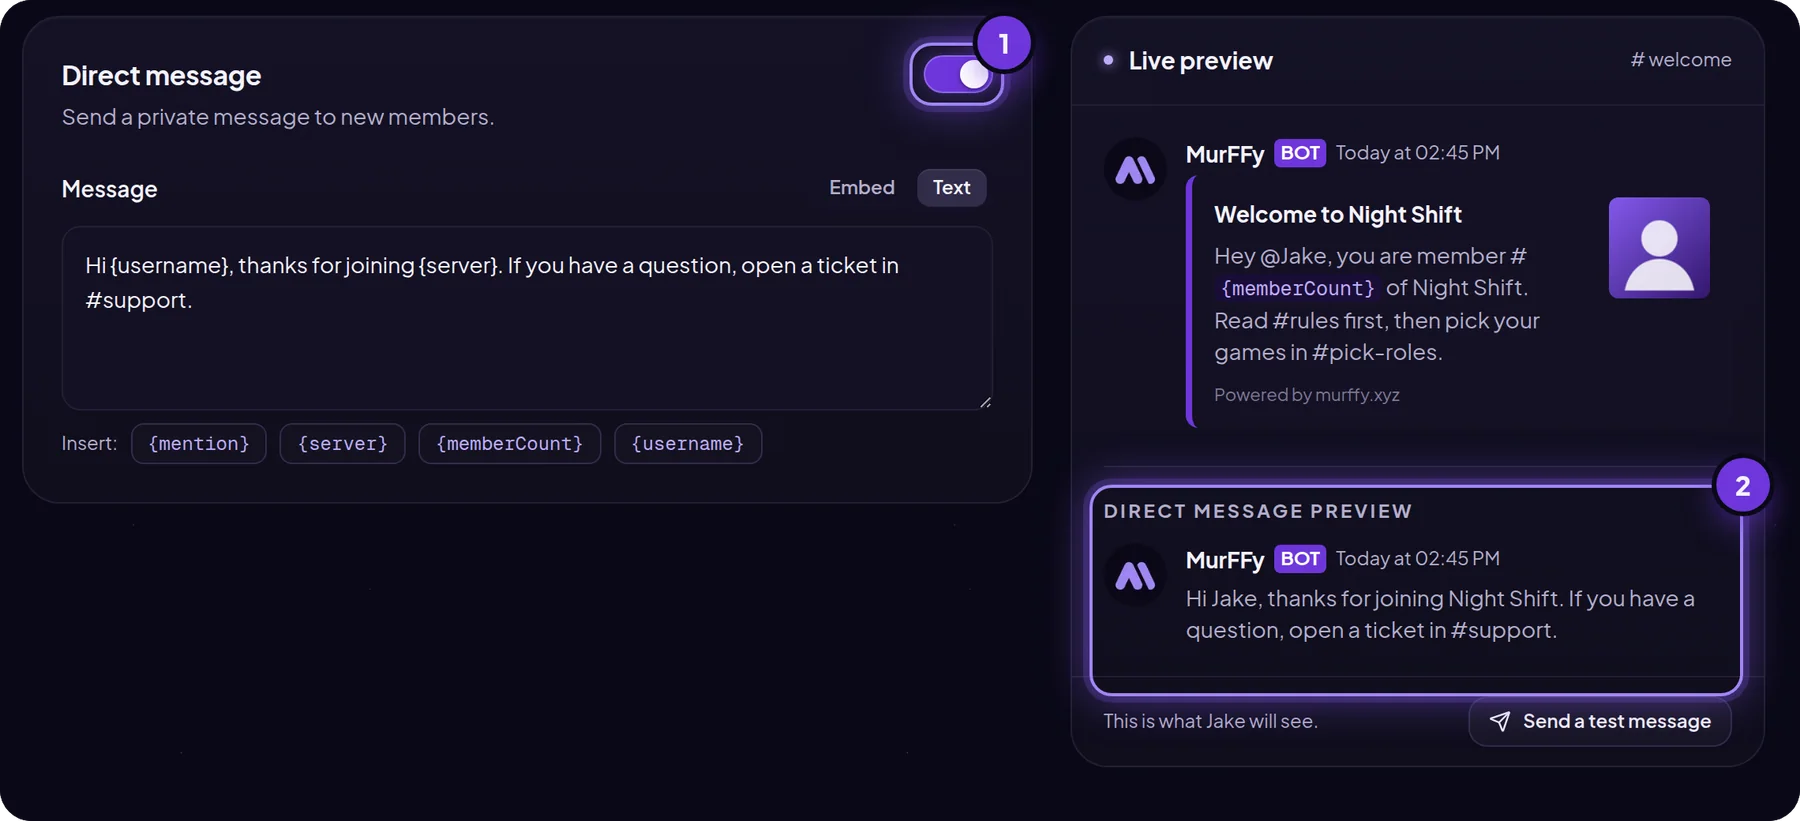
Some people block DMs from server members, so treat the DM as an extra, not a replacement for the channel welcome.
Step 5. Give new members a role automatically (auto role)
An automatic starter role is useful when you want to:
- unlock the basic channels only after someone joins,
- tell newcomers apart from regulars,
- prepare verification, for example a Newcomer role removed after reading the rules.

Open Join Role, click Add role and pick a role. You can also mark a role as bots only, so new bots get a Bots role and people never see it.
Most common mistake: the MurFFy bot role must be above the role it gives in Server Settings → Roles. Discord doesn't let bots assign roles higher than their own. Drag the MurFFy role above your member roles.
If you want members to pick their own roles (games, pings, colors), see the guide to reaction roles with buttons.
Goodbye messages
The Goodbye module works exactly like Welcome: channel, text, embed or plain text, image and random variants. On a small server, {username} left the server. We are {memberCount} now. tells the team someone left. On a big server, send goodbyes to a staff channel so they don't clutter chat.
Welcome messages not working? Check these 4 things
- The module is on and a channel is selected.
- The bot can see and write in the channel. It needs View Channel, Send Messages, Embed Links (for embeds) and Attach Files (for images).
- The bot role is above the join roles.
- The test from the dashboard arrives. If the test works but real joins don't, check whether another verification bot holds new members first.
FAQ
Are MurFFy welcome messages free?
Yes. The welcome message, welcome image, DM, random variants and join roles are all on the free plan. Premium removes the Powered by murffy.xyz footer from the embed and lets you set your own.
How do I mention the new member?
Use {mention}. The bot turns it into a ping and the new member gets a notification.
Can welcome and goodbye messages go to different channels?
Yes. The two modules are configured separately and each has its own channel.
How do I make a Discord welcome image without Photoshop?
Turn on the Welcome image, pick a template and change the colors or background. The bot adds each new member's avatar and name for you.
What's next
A welcome is only the start. Give people a reason to come back with a leveling system with role rewards and reaction roles. Starting from scratch? Follow the full Discord server setup checklist.
Set up welcome messages in MurFFy →
Learn more about the module on the Discord welcome bot page.